Move a certificate from Microsoft IIS 6.0 to Microsoft IIS 7.0
Step 1: Export Certificate and Private Key from the IIS 6.0 server
Note: The following steps will create a backup
copy of the current certificate and key, the process will not affect
the functionality of the existing certificate on your server.
Create an MMC Snap-in for Managing Certificates:
- Start > run > MMC
- Go into the Console Tab > File > Add/Remove Snap-in

- Click on Add > Click on Certificates and click on Add


- Choose Computer Account

- Choose Local Computer

- Close the 'Add Standalone Snap-in' window.
- Click on OK at the 'Add/Remove Snap-in' window.


- Open up the Certificates Console Tree
- Look for a folder called Personal > Certificates

- Select the Certificate that you wish to back up.
- Right-click on the file and choose All Tasks > Export
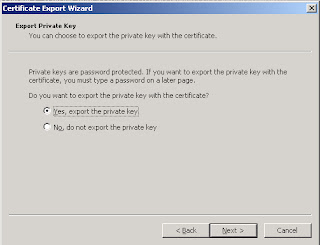
- The 'Certificate Export Wizard' will start up. Click Next
- Choose Yes, export the private key
- Select Include all certificates in the certification path (This is optional) and click on Next

- Set a password to protect the export of the Private key file with the Certificate. Click on Next

- Choose to save the file to a set location.

- Type the file name in the File Name box, and click Save.
- Click on Next - The file is given a *.pfx file-name extension and should be saved to your hard disk drive. It is important to make a copy of the Private Key that does not reside on the actual server, in the event that the server crashes.
- Click Finish
- A message will appear that states 'The export was successful' when the export has been completed. Click Ok.


Step 2: Import Certificate and Private Key onto the IIS 7.0 server
- Open IIS Manager and navigate to the level you want to manage.
- In Features View, double-click Server Certificates.

- In the Actions pane, click Import.

- In the Import Certificate dialog box, do the following: Type a file name in the Certificate file box or click the browse button (…) to navigate to the name of a file where the exported certificate is stored. Type a password in the Password box if the certificate was exported with a password. Select Allow this certificate to be exported to be able to export the certificate, or clear Allow this certificate to be exported to not allow additional exports of this certificate.
- Click OK.


In Microsoft IIS 7.0, the HTTPS protocol is required to be bound to a Web site which will also assign the installed certificate
- Open Internet Information Services (IIS) Manager (inetmgr)
- Browse to your server name > Sites > Your SSL-based site
- From the right hand Actions pane, choose Bindings

- In the Site Bindings window, choose Add
- From the Add Site Bindings window, select the binding type as https
- From the SSL certificate drop down, select the SSL certificate that will be used for this site
- Click OK
