Friday 31 May 2013

Disable error console in opera

Disable error console in opera


In order to disable this window from popping up, type opera:config at address bar and search for “Error Console Filter”. You should see something similar to:

Clear the field such that the filter is empty, and then click on ‘Save’.

The error console shall bug you no more.

Enjoy!!!

Thursday 30 May 2013

This connection is untrusted

This connection is untrusted


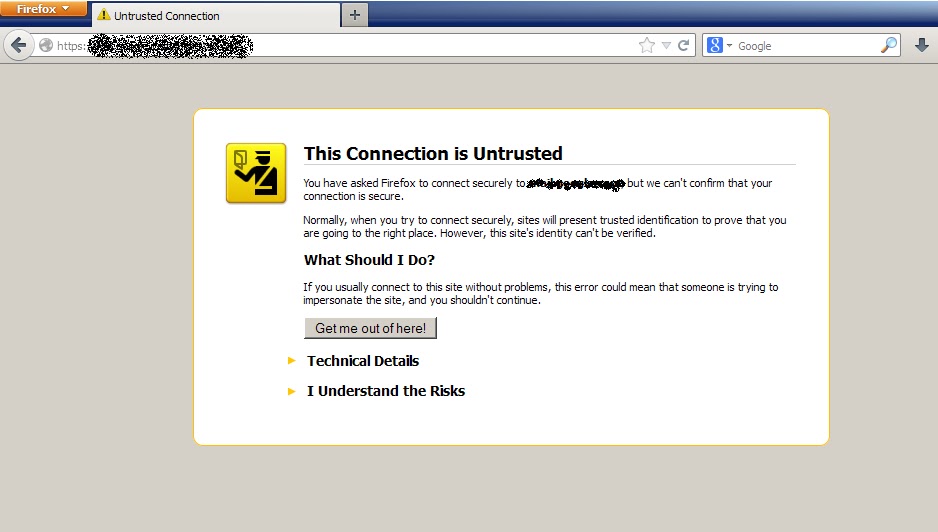
Some times you can face the Warning message "This connection is untrusted" when accessing secured (SSL certified - https://) websites such as Mail site, Banking site. But this is not an issue.

The main reason of the Warning message is Date and Time were changed in your Computer caused by CMOS (BIOS) battery fail in Mother board. After replaced battery, modify the Date and Time. Now your problem will be resolve.

Wednesday 29 May 2013

Computer runs but no display on monitor

Computer runs but no display on monitor

Some time you Computer runs but no display on Monitor for fallowing reasons.
  1. After changed Monitor suddenly (Resolution is not match to new Monitor)
  2. If any problem in Display card (PCI) or Monitor cable
  3. If you play high quality Video (Graphic card is not supported to play)
To resolve this issue....
       Restart your Computer → Press F8 key before booting to OS → Select 'Enable VGA Mode' option → Press Enter → After boot to Operating System, then restart your compute again as Normally (Without pressing F8 key.

Wednesday 22 May 2013

Move a certificate from IIS6 to IIS7

Move a certificate from Microsoft IIS 6.0 to Microsoft IIS 7.0


Step 1:  Export Certificate and Private Key from the IIS 6.0 server
Note: The following steps will create a backup copy of the current certificate and key, the process will not affect the functionality of the existing certificate on your server.
Create an MMC Snap-in for Managing Certificates: 
  1. Start > run > MMC
  2. Go into the Console Tab > File > Add/Remove Snap-in

  3. Click on Add > Click on Certificates and click on Add
  4.  Choose Computer Account
  5. Choose Local Computer
  6. Close the 'Add Standalone Snap-in' window.
  7. Click on OK at the 'Add/Remove Snap-in' window.
     
Export the Certificate with Private Key attached:
  1. Open up the Certificates Console Tree
  2. Look for a folder called Personal > Certificates
  3. Select the Certificate that you wish to back up.
  4. Right-click on the file and choose All Tasks > Export
  5. The 'Certificate Export Wizard' will start up. Click Next
  6. Choose Yes, export the private key
  7. Select Include all certificates in the certification path (This is optional) and click on Next
  8. Set a password to protect the export of the Private key file with the Certificate. Click on Next
  9. Choose to save the file to a set location. 
  10. Type the file name in the File Name box, and click Save.
  11. Click on Next  - The file is given a *.pfx file-name extension and should be saved to your hard disk drive. It is important to make a copy of the Private Key that does not reside on the actual server, in the event that the server crashes. 
  12. Click Finish
  13. A message will appear that states 'The export was successful' when the export has been completed. Click Ok.
     
Step 2: Import Certificate and Private Key onto the IIS 7.0 server  
  1. Open IIS Manager and navigate to the level you want to manage.
  2. In Features View, double-click Server Certificates.
  3. In the Actions pane, click Import.
  4. In the Import Certificate dialog box, do the following: Type a file name in the Certificate file box or click the browse button (…) to navigate to the name of a file where the exported certificate is stored. Type a password in the Password box if the certificate was exported with a password. Select Allow this certificate to be exported to be able to export the certificate, or clear Allow this certificate to be exported to not allow additional exports of this certificate.
  5. Click OK.
Step 3: Add an HTTPS binding to a Web site
In Microsoft IIS 7.0, the HTTPS protocol is required to be bound to a Web site which will also assign the installed certificate
  1. Open Internet Information Services (IIS) Manager (inetmgr)
  2. Browse to your server name > Sites > Your SSL-based site
  3. From the right hand Actions pane, choose Bindings
  4. In the Site Bindings window, choose Add
  5. From the Add Site Bindings window, select the binding type as https
  6. From the SSL certificate drop down, select the SSL certificate that will be used for this site
  7. Click OK

Friday 17 May 2013

Chat with Friends through Command Prompt (CMD)

Chat with Friends through Command Prompt (CMD)

Hello friends Now you can Chat with other users / friends through Command Prompt . 

This is a Trick.

1) All you need is your friend's IP Address and your Command Prompt.

2) Open Notepad and write this code as it is.....!

@echo off
:A
Cls
echo MESSENGER
set /p n=User:
set /p m=Message:
net send %n% %m%
Pause
Goto A


3) Now save this as "Messenger.Bat".

4) Open Command Prompt.

5) Drag this file (.bat file) over to Command Prompt and press Enter.

6) You would then see something like this:


 7) Now, type the IP Address / Computer name of the computer you want to contact and press enter

You will see something like this:


8) Now all you need to do is type your message and press Enter.
Start Chatting.......!


Enjoy!!!

To show your name in taskbar

To show your name in taskbar


Trick to Show Your name after time in task bar...
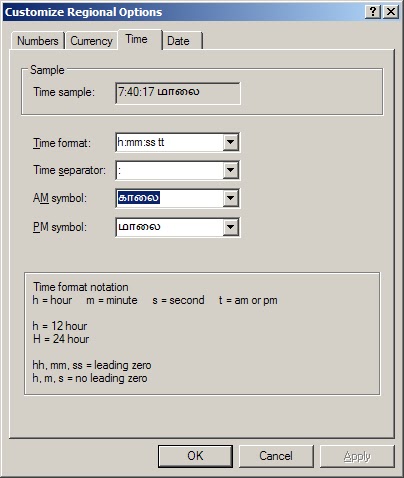
Try this trick to add up ur name in place of AM and PM beside time Its simple

Step-1: Navigate to → Start
Control PanelRegional and Language OptionClick on CustomizeGo to TIME TabChange AM symbol and PM symbol from AM and PM to your nameApplyOK ...
Did It change? If not, follow step-2 below.

Step2: Now go to time in taskbar and Double Click it to open "Date and time property" ...Look place where time changes in digital form i.e. 02:47:52 AM , click to arrow to change the AM or PM by selecting and press arrow. It will Show ur name or name that was entered by you, Apply
OK 


Fix corrupted files in Windows XP

Fix corrupted files in Windows XP

1.Insert Windows XP cd into CD/DVD drive

2. go to Run

3. type "sfc /scannow" (Without quotes)


4. Then press Enter.


5. It will copy new files from Disk.


(Note: Before run this command insert OS disk into CD/DVD drive or Map (Mount) OS's ISO file as a drive)


Increase the speed of your file sharing

Increase the speed of your File sharing

Simple Way to Share Multiple Folders :
 

  1. Go to Run and Type SHRPUBW.EXE then press Enter
  2. Select the folder you want to share and Set permissions 

Your share folder is ready now to access as fast..... 

To create a Folder without any name

To create a Folder without any name


  1. Create a new Folder or Rename a Folder.
  2. Press alt & type 0160 or 255
  3. Then press Enter.
Now you can get a Folder without any name.

Thursday 16 May 2013

Reset your Windows Administrator Password while emergency

Reset your Windows Password while emergency

To reset Windows users / administrator password is very very very simple.

Need an external boot CD (Hiren's boot CD ). You download and burn it as Bootable disk.

       Boot your computer by using above mentioned any Boot CD. Select Mini Windows XP and press enter. Now your system will boot through Mini Windows XP Operating System.

  1. Go to C:\WINDOWS\system32 and find the file "sethc.exe". Rename it as "Old sethc.exe".
  2. Then find file "cmd.exe" and rename it as "sethc.exe". 
  3. Now remove the Boot CD from CD/DVD drive and restart your computer. 
  4. On logon page (you don't try to login) press the SHIFT key 5 times. You can get Command prompt window.
  5. In this window type "net user Administrator *"

  6. Press enter (Don't  type any password).
  7. Again press enter (Don't  type any password).
  8. Now your Administrator Password has been reseted successfully.
Enjoy !!!


To make fast Boot your Computer

To make fast Boot your Computer

       Most of the Computers had enabled all Services and all (installed) Applications while system booting (Start up) by default. Since your computer will take time to stable after Login. Also computer will slow No need all Services and Applications while starting. So see the below steps; and decide that which Applications / Services are you want on system start up.

Go to Run → Type msconfig →

Go to Startup TAB, then remove Tick mark unwanted.

Then Go to Services TAB, Tick option "Hide all Microsoft Services". Now you can remove all unwanted applications from the list.

 Then press Apply and OK buttons and Restart your computer.

After restart your computer you can feel the Speed 100% sure while Login and Working.

After these steps if you could not get Good performance, may be the problem is in your computer's HDD. 

To conform whether HDD is problem or not,  Watch the HDD LED in front of cabinet (CPU Box). When computer is in Ideal, HDD's LED should not Glow / Blink continuously. This is normal. Otherwise If glowing continuously defensively your HDD is problem. Chang that Hard disk.


Tuesday 14 May 2013

How to Import mail messages from Outlook express to Windows Live mail?

To Import mail messages from Outlook express to Windows Live mail

Open Windows live mail (In any Operating system of Windows), Go to FileImportMessages,

Now brows and select path of Outlook express's stored location.

 You can visible now all Folders and Sub folders. Now you select a particulate folder or select All folders. 

Now click the Next button to Import Mail Messages.

Wednesday 8 May 2013

A first aid kit for your Computer

A first aid kit for your Computer

This software contain Partition Tools, Backup & Recovery, Antivirus Tools, Testing Tools, Password Tools and Mini Windows XP. This will help you sure 100%. Download and enjoy.

When it comes to having a certain PC streamlined, base lined, or simply reformatted, there are various ways to do so. Many resort to using the traditional clean install, where the primary driver is reformatted, thus leaving the PC clean and new, and the only thing that is very tedious to do afterwards are none other than installing once again the drivers or hardware installed on the computer, which usually take 2 or 3 hours to finish. What more if the computer is having a problem to boot or load the operating system? What if the BIOS (Basic I/O or Input / Output System) becomes corrupt thus not able to access the operating system like Windows or Mac, and not being able to access the files? Well, there is a solution to this, and it’s another easy to use software: Hiren’s BootCD.

Hiren’s BootCD is a boot disk utility that will help in resolving and making reformatting your computer easy. This kind of compilation software provides a compilation of programs to help resolves most and some uncommon Internet and computer issues like driver failure, intermittent internet connection and other computer malfunctions.


To Download click here.


Tuesday 7 May 2013

“Dedicated administrator connections are not supported” message in SQL Server

“Dedicated administrator connections are not supported” message in SQL Server


When you try to login to SQL Server using Dedicated administrator connection (DAC) via Object Explorer you will receive an error message:
Dedicated administrator connections are not supported.
(ObjectExplorer)

or:
Dedicated administrator connections are not supported.
(Microsoft.SqlServer.Management.SqlStudio.Explorer)


Object Explorer cannot connect using the DAC.
To connect to DAC using Database Engine Query, in SQL Server Management Studio click:
File -> New -> Database Engine Query
In the Connect to Database Engine dialog box, in the Server name box, type ADMIN:Instance_name
To connect to a SQL Server instance (-S) to master database (-d) using DAC (-A) with integrated security (-E) in sqlcmd:
sqlcmd -A -d master -E -S instance_name
To connect to a SQL Server instance (-S) to master database (-d) using DAC (-A) with SQL security with SQL login (-U) and password (-P) in sqlcmd:
sqlcmd -A -d master -U sa -P Passw0rd -S instance_name
SQL Server Browser service must be running to connect to Dedicated administrator connection (DAC).
It is possible to make only one connection at a time with DAC.
If the DAC is already in use, the connection will fail.
Did you find this post helpful? If so, please share it. 
 
Thanks!


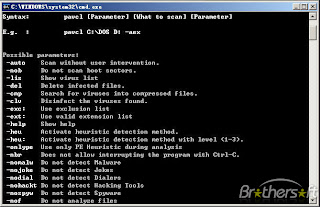
How to perform a VirusScan Command Line scan in Microsoft Windows

How to perform a VirusScan Command Line scan in Microsoft Windows


  1. Download the latest VCLS from the McAfee Downloads site. The VCLS has the most up-to-date cutting edge generic drivers.

    To download McAfee products, updates, and documentation, visit the Downloads page at http://www.mcafee.com/us/downloads/downloads.aspx.

    For instructions on downloading, see: KB56057.
     
  2. Create a folder on the root of your primary partition. In this example: c:\scan\.
  3. On the infected computer, extract the contents of vscl-w32-6.0.3-l.zip or later to c:\scan\.
  4. Download the latest beta DAT file.
    To download a DAT, Engine, SuperDAT (DAT + Engine), BetaDAT, or Stinger, go to http://www.mcafee.com/apps/downloads/security-updates/security-updates.aspx.

    You might have to download these if your automated update fails or if you want to use an ExtraDAT on an infected system.

     
  5. Extract the contents of avvwin_netware_betadat.zip to c:\scan\ and overwrite the existing files.
  6. Click Start, Run, type cmd and press ENTER.
  7. Navigate to c:\scan, type the following command, and press ENTER:

    scan.exe /adl /all /analyze /clean /program /unzip /winmem /rptall /report=c:\scan.log

    This starts a complete system scan, which is best practice.